환경 : CentOS 7 기본설치
1. git 명령어를 입력해보자.
[binrang@localhost ex-electrode-app]$ git
bash: git: 명령을 찾을 수 없습니다...
git 이 없다...T.T;;
2. yum을 이용하여 git을 설치 해본다.
[binrang@localhost ex-electrode-app]$ yum -y install git
Loaded plugins: fastestmirror, langpacks
You need to be root to perform this command.
똑같은 실수다. root계정이 아니니... sudo를 이용했어야지..
[binrang@localhost ex-electrode-app]$ sudo yum -y install git
[sudo] password for binrang:
Loaded plugins: fastestmirror, langpacks
Loading mirror speeds from cached hostfile
* base: mirror.oasis.onnetcorp.com
* epel: ftp.jaist.ac.jp
* extras: mirror.oasis.onnetcorp.com
* updates: mirror.oasis.onnetcorp.com
....
Installed:
git.x86_64 0:1.8.3.1-6.el7_2.1
Dependency Installed:
perl-Error.noarch 1:0.17020-2.el7 perl-Git.noarch 0:1.8.3.1-6.el7_2.1 perl-TermReadKey.x86_64 0:2.30-20.el7
Complete!
[binrang@localhost ex-electrode-app]$
OK.. 설치 완료!!
3. 이번엔 Github에 계정을 만들고 레포지토리(저장소)를 만들자.
Github 에 접속을 한다.
4. 다시 자신의 OS로 돌아와서 하라는 대로 해보자.
Good Luck!!
 |
| Github의 첫페이지. 여기서 Sign up을 클릭하면 계정을 생성할수 있다. |
 |
| Step 1 : ID 등 각 정보 입력 |
 |
| Step 2 : 공짜로 할거냐? 돈내고 Private 로 쓸거냐?. |
 |
| Step 3 : 귀찮은 정보 입력 |
 |
| 계정이 생성되었다. Start a Project 를 클릭한다. |
 |
| 하지만 너의 이메일로 가서 인증부터 하란다. |
 |
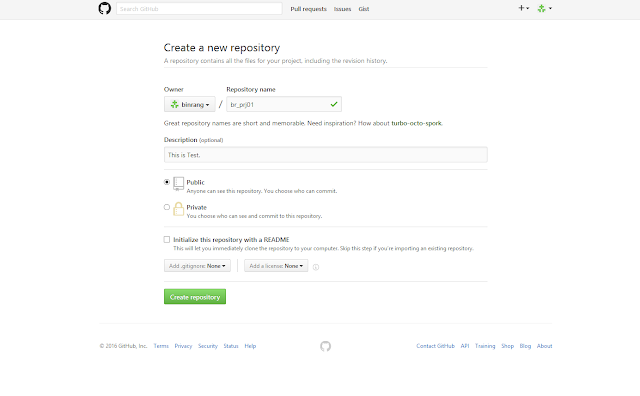
| 이제 프로젝트를 생성한다. 공짜라 Public이다. |
 |
| 생성된 프로젝트 아래 보면 git 명령어 사용법이 잘 나와 있다. 따라 해 보자. |
4. 다시 자신의 OS로 돌아와서 하라는 대로 해보자.
1
|
[binrang@localhost br_prj01]$ echo "# br_prj01" >> README.md
|
1
2
3
|
[binrang@localhost br_prj01]$ git init
Initialized empty Git repository in /home/binrang/br_prj01/.git/
[binrang@localhost br_prj01]$
|
1
2
3
4
5
6
7
8
9
10
11
12
13
14
15
16
17
|
[binrang@localhost br_prj01]$ git commit -m "first commit"
[master (root-commit) 32664ee] first commit
Committer: binrang <binrang@localhost.localdomain>
Your name and email address were configured automatically based
on your username and hostname. Please check that they are accurate.
You can suppress this message by setting them explicitly:
git config --global user.name "Your Name"
git config --global user.email you@example.com
After doing this, you may fix the identity used for this commit with:
git commit --amend --reset-author
1 file changed, 1 insertion(+)
create mode 100644 README.md
[binrang@localhost br_prj01]$
|
1
2
|
[binrang@localhost br_prj01]$ git remote add origin https://github.com/binrang/br_prj01.git
[binrang@localhost br_prj01]$
|
1
2
3
4
5
6
7
8
9
10
|
[binrang@localhost br_prj01]$ git push -u origin master
Username for 'https://github.com': binrang
Password for 'https://binrang@github.com':
Counting objects: 3, done.
Writing objects: 100% (3/3), 222 bytes | 0 bytes/s, done.
Total 3 (delta 0), reused 0 (delta 0)
To https://github.com/binrang/br_prj01.git
* [new branch] master -> master
Branch master set up to track remote branch master from origin.
[binrang@localhost br_prj01]$
|
 |
| Github에 가서 프로젝트 Code 메뉴를 보면 README.md 가 추가된것을 확인했다. |
Good Luck!!
댓글 없음:
댓글 쓰기