2. git 을 이용하여 튜토리얼을 내려받자.
[binrang@binrang react]$ git clone https://github.com/reactjs/react-router-tutorial
Cloning into 'react-router-tutorial'...
remote: Counting objects: 568, done.
remote: Total 568 (delta 0), reused 0 (delta 0), pack-reused 568
Receiving objects: 100% (568/568), 94.26 KiB | 0 bytes/s, done.
Resolving deltas: 100% (353/353), done.
[binrang@binrang react]$ ls -al
합계 4
drwxrwxr-x. 3 binrang binrang 34 10월 21 14:22 .
drwx------. 21 binrang binrang 4096 10월 21 14:21 ..
drwxrwxr-x. 4 binrang binrang 64 10월 21 14:22 react-router-tutorial
[binrang@binrang react]$
|
3. 설치된 튜토리얼에서 디렉토리를 이동한다.
[binrang@binrang react]$ cd react-router-tutorial/
[binrang@binrang react-router-tutorial]$ cd lessons/01-setting-up/
[binrang@binrang 01-setting-up]$
|
4. npm 을 이용하여 필요한 패키지를 설치한다.
[binrang@binrang 01-setting-up]$ npm install
tutorial@1.0.0 /home/binrang/react/react-router-tutorial/lessons/01-setting-up
├─┬ babel-core@6.17.0
│ ├─┬ babel-code-frame@6.16.0
│ │ ├─┬ chalk@1.1.3
│ │ │ ├── ansi-styles@2.2.1
│ │ │ ├── escape-string-regexp@1.0.5
│ │ │ ├── has-ansi@2.0.0
.......
├── supports-color@3.1.2
└── webpack-dev-middleware@1.8.4
npm WARN optional SKIPPING OPTIONAL DEPENDENCY: fsevents@^1.0.0 (node_modules/chokidar/node_modules/fsevents):
npm WARN notsup SKIPPING OPTIONAL DEPENDENCY: Unsupported platform for fsevents@1.0.14: wanted {"os":"darwin","arch":"any"} (current: {"os":"linux","arch":"x64"})
npm WARN tutorial@1.0.0 No repository field.
[binrang@binrang 01-setting-up]$
|
5. npm을 시작해보자.
[binrang@binrang 01-setting-up]$ npm start
> tutorial@1.0.0 start /home/binrang/react/react-router-tutorial/lessons/01-setting-up
> webpack-dev-server --inline --content-base .
http://localhost:8080/
webpack result is served from /
content is served from /home/binrang/react/react-router-tutorial/lessons/01-setting-up
Hash: 0f855d4780b9107cd375
Version: webpack 1.13.2
Time: 1840ms
Asset Size Chunks Chunk Names
bundle.js 913 kB 0 [emitted] main
chunk {0} bundle.js (main) 862 kB [rendered]
[0] multi main 40 bytes {0} [built]
[1] (webpack)-dev-server/client?http://localhost:8080 3.97 kB {0} [built]
......
[231] ./~/react/lib/deprecated.js 1.77 kB {0} [built]
[232] ./~/react-dom/index.js 63 bytes {0} [built]
[233] ./modules/App.js 467 bytes {0} [built]
webpack: bundle is now VALID.
|
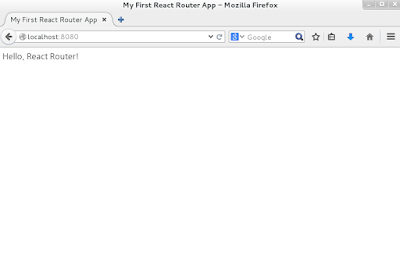
6. 브라우저를 이용하여 http://localhost:8080 을 열어보자.
7. 위 화면을 확인하였으면 다른 쉘을 열어 App.js 파일을 수정해보자. 이 때 npm start 를 한 쉘은 그대로 놔둔다.
[binrang@binrang 01-setting-up]$ cd modules/
[binrang@binrang modules]$ ls -al
합계 8
drwxrwxr-x. 2 binrang binrang 19 10월 21 14:22 .
drwxrwxr-x. 4 binrang binrang 4096 10월 21 14:28 ..
-rw-rw-r--. 1 binrang binrang 125 10월 21 14:22 App.js
[binrang@binrang modules]$ vi App.js
import React from 'react'
export default React.createClass({
render() {
return <div>Hello, React Router!</div>
}
})
|
import React from 'react'
export default React.createClass({
render() {
return <div>Hello</div>
}
})
|
그러면 npm start 했던 쉘에서 아래와 같이 움직이는 것을 확인 할 수 있다.
webpack: bundle is now INVALID.
Hash: c050b0b3706dfe161a19
Version: webpack 1.13.2
Time: 189ms
Asset Size Chunks Chunk Names
bundle.js 913 kB 0 [emitted] main
chunk {0} bundle.js (main) 862 kB [rendered]
[233] ./modules/App.js 452 bytes {0} [built]
+ 233 hidden modules
webpack: bundle is now VALID.
|
웹 화면을 보면 바로 적용이 된것을 확인 할 수 있다.
참고 URL : lessons/01-setting-up
.


댓글 없음:
댓글 쓰기